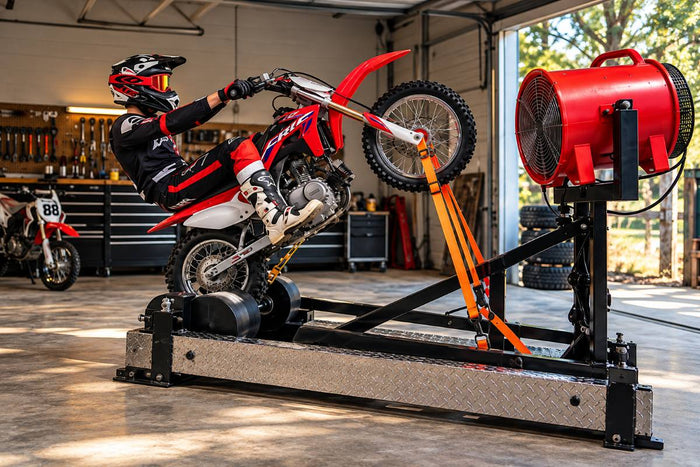
On a dirt bike, a botched wheelie costs you a lever. On a sport bike or a Harley it can cost you fairings, a subframe and a lot more besides. That's exactly why heavier road bikes are where a trainer earns its keep. Here's how it works for street riders.
Why street bikes are harder to learn on
Road bikes aren't built for wheelies the way dirt bikes are. In our bike-by-bike comparison, naked street bikes rate moderate and sport bikes rate harder — the geometry is aggressive, the bikes are heavier, and the power can arrive faster than a beginner can react.
- Weight. More mass to lift, and far more momentum to manage when it comes back down.
- Power. Plenty of road bikes will lift the front on throttle alone. Without precise inputs, it comes up faster than you expect.
- Expensive bodywork. Fairings, mirrors, levers and subframes are all in the firing line if it goes wrong.
- Nowhere legal to practise. Street riders don't have a backyard track, and practising on public roads earns tickets at best.
Put those together and the usual "just keep trying" approach is a bad bet. A trainer takes the bike out of harm's way while you learn the skill.
How a street bike wheelie trainer works
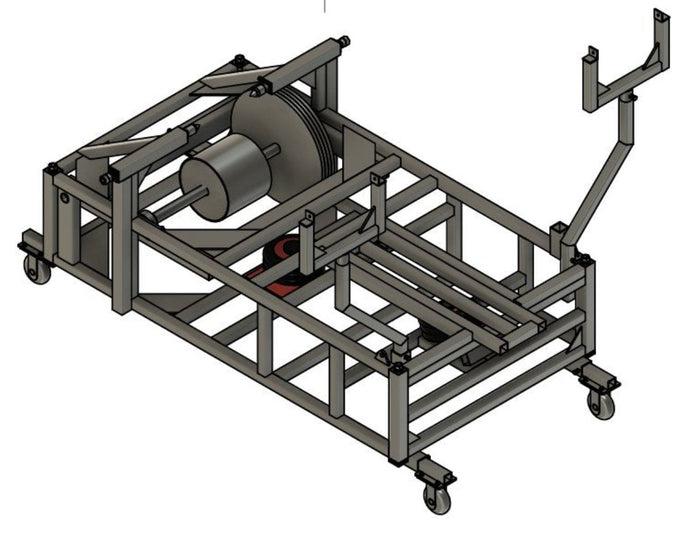
The bike mounts on an adjustable attachment that grips the hollow rear axle, with the rear tyre driving a roller. When you lift the front, an airbag sprung ramp cushions it and boosts the bike toward the balance point, while the back roller and anti-loop straps set exactly how far it can go. You use your own clutch, throttle and rear brake throughout, so the skill transfers straight to the road.
The difference from the street is simple: when you get it wrong, the rig catches the bike instead of the tarmac. When you're ready to try it outside, follow our guide on how to wheelie a street bike.
Setting it up for a heavy road bike
- Dial in the wheelbase. Road bikes and cruisers run longer wheelbases than dirt bikes. Slide the adjustable back roller to suit, using the fitment guide in the plans.
- Start with the straps short. Set the anti-loop straps so the front only lifts a little in your first sessions. Give it more length as your control improves.
- Run the ramp softer. The airbag ramp can be set softer while you learn, which takes the sting out of a heavy front end coming down.
- Fans on, every time. A stationary bike gets no airflow, and big road engines make a lot of heat. Keep the cooling fans running for the whole session.
- Plant the base. Drop the jack stands so the rig sits dead flat before the bike goes on.
Sport bikes
Sport bikes have the power to lift easily and the geometry to make it twitchy. That combination is why a sport bike wheelie trainer is so useful: you learn exactly how little throttle it takes, and how fast the rear brake brings it back, without risking a bike covered in expensive plastic.
Most riders are better off learning the clutch-up first, because it gives a smoother, more predictable lift than a pure throttle wheelie. See clutch vs. power wheelies for why.
Ready to build one?
Skip the guesswork — get the complete step-by-step build plans.
Get The Plans — $59Naked bikes
Upright naked bikes sit between the two. The riding position is more relaxed than a sport bike, which helps balance, and there's less bodywork to break. They're a good middle ground — but they're still heavy and powerful enough that learning on the street is a gamble you don't need to take.
Harleys and cruisers
Yes, a Harley can go on the machine. The adjustable design fits everything up to full-size Harleys. These are some of the heaviest bikes anyone tries to lift, which makes control on the way down just as important as the lift itself. A Harley wheelie trainer setup lets you practise both ends of the movement with the straps catching any mistake. Heavy bikes need more finesse, not more courage.
The rear brake matters more on a big bike
Whatever you ride, the rear brake is your undo button: a light tap drops the front instantly. On a heavy road bike, that reflex is the difference between a save and a loop-out. Cover the brake from the very first rep and drill using it until it's automatic. Read the rear brake: your #1 wheelie safety tool before your first session.
The heavier the bike, the more it pays to learn on a machine that won't let you fall.
Space, gear and ventilation
A road bike on a rig needs a bit of room. Set up on a flat, solid floor — a concrete garage slab or driveway is ideal — with enough clearance in front for the front wheel to come up and enough space behind for the roller. The jack stands need firm ground to sit on; soft dirt or gravel lets them creep.
You'll be running the engine for long stretches, so ventilation isn't optional. Train with the garage door open or outside, never in a closed space where exhaust fumes can build up. The fans help cool the engine, but they're not a substitute for fresh air.
Wear your gear, too. The machine stops the bike looping, but you're still on a running motorcycle with a spinning rear wheel. Helmet, gloves, boots and a jacket — the same kit you'd ride in.
From the machine to the road
The goal of the rig is to make your first real-world wheelie feel familiar. By the time you take it out, the clutch lift, the balance point and the rear-brake reflex should all be automatic. Start somewhere quiet, open and legal, in a low gear, and keep the first attempts small. You're not learning anything new at that point — you're just doing what you've already drilled, on a different surface.
Cheaper than one dropped bike
A single loop-out on your own bike can cost $2,000+ in bent subframes, smashed plastics and broken levers. Commercial machines from other sellers are often one size and not adjustable, and freight is extra. Pro schools charge $300+ a day. Building your own street bike wheelie trainer costs $59 for the plans plus around $1,500 in materials, depending on your local prices, and you can finish it in a weekend with a welder, grinder, drill and hammer. The full comparison is in our DIY vs. buying cost breakdown.
Get the plans
Our build plans give you step-by-step PDF instructions, detailed blueprints with exact measurements, a full materials list from local suppliers, a multi-bike fitment guide that covers street bikes and Harleys, and printable workshop diagrams. Instant download, lifetime updates and a 6-month money-back guarantee. Build it once and arrive at your first road wheelie already knowing the balance point.
Frequently asked questions
Will the machine fit my sport bike?
In almost every case, yes. The adjustable mount and back roller fit everything from pit bikes to sport bikes, naked bikes and full-size Harleys. Check that your bike has a hollow rear axle, as that's what the mount grips.
Is it safe to put a heavy bike on a wheelie machine?
Yes, when it's built correctly. The anti-loop straps, back roller, airbag ramp and jack stands work together to keep the bike planted and stop it going over. Safety comes from following accurate plans — see are wheelie machines safe?
Should I learn on a smaller bike first?
If you have one, a lighter bike is easier to learn on. But on a trainer the rig catches the bike either way, so you can safely learn on the bike you actually ride.
Build your own wheelie machine
Put this into practice. Get the complete DIY plans — instant download, fits any bike, 6-month guarantee.
See The Plans →