Riders who learn wheelies fast aren't braver than everyone else — they just get more reps. A dedicated practice rig lets you rack up those reps in your garage, safely, on your own bike. Here's what it is, how to use it, and how to get one without spending thousands.
Practice is the whole skill
A wheelie is one movement repeated until your body stops arguing with it: lift the front, find the balance point, hold it with tiny throttle and brake corrections, set it down. There's no secret beyond that. The riders who get good are the ones who did it more times than everyone else.
The trouble is that on the road, practice is rationed by risk. Every attempt could end in a loop-out, a ticket or a $2,000+ repair bill, so you do a handful, scare yourself and go home. A dedicated rig takes the risk away, so the only limit on reps is how long you want to train.
What a wheelie training machine is
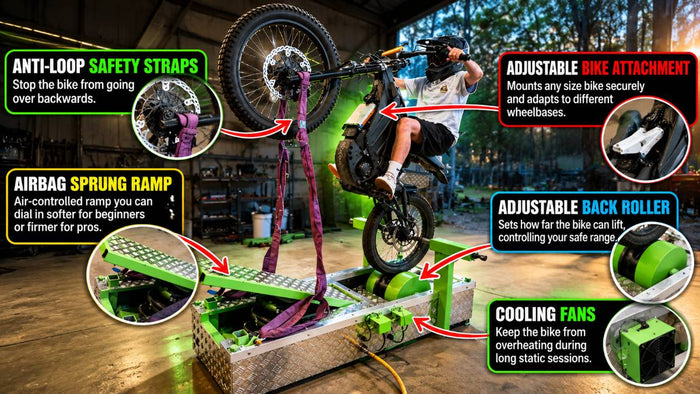
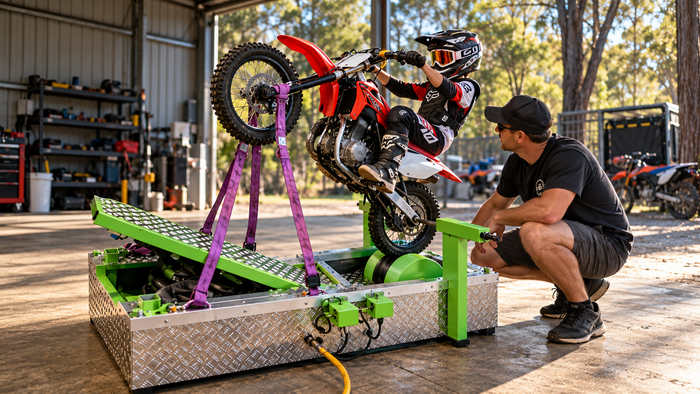
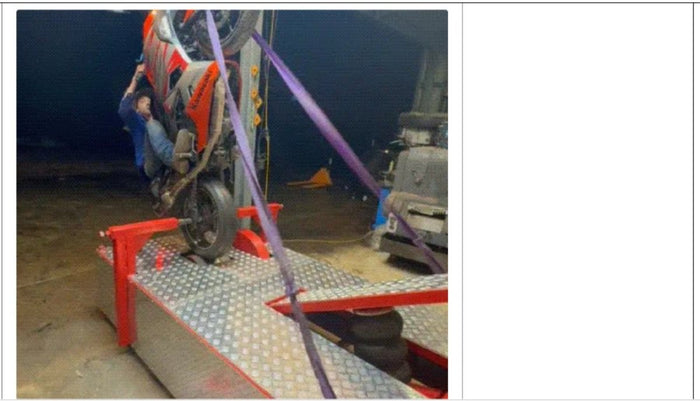
It's a stationary rig your bike mounts onto. The rear wheel spins on a roller, the front lifts for real, and the machine physically stops the bike from going past a safe angle. You ride it with your own controls, so every rep trains the same reflexes you'll use on the street or the trail. You'll also see it called a motorcycle wheelie simulator.
The key systems:
- Anti-loop safety straps — set the maximum lift so you can't go over backwards.
- Adjustable back roller — matches the rig to your wheelbase and controls your safe range.
- Airbag sprung ramp — cushions the front on the way down and boosts the bike toward the balance point.
- Cooling fans — keep a stationary engine from overheating through long sessions.
- Jack stands — keep the whole rig flat and planted.
For a closer look at how the parts work together, see what is a wheelie machine.
A practice plan for your first sessions
Having a machine is half of it. Using it with a plan is the other half. Here's a simple structure that works for most riders — move to the next stage only when the current one feels easy.
| Stage | Focus | Move on when… |
|---|---|---|
| 1. Brake reflex | Small lifts, tap the rear brake to set down | Covering the brake is automatic |
| 2. Smooth lift | Controlled clutch slip, gentle throttle | The front comes up the same way every time |
| 3. Find the point | Lengthen the straps, lift until the bike feels weightless | You can feel the point without looking |
| 4. Hold | Tiny throttle and brake corrections | You hold it calmly instead of fighting it |
| 5. Clean set-down | Lower the front smoothly, every rep | Landings are as controlled as lifts |
Stage three is the one that changes everything. Once you've felt the balance point a few hundred times, it stops being scary and starts being familiar. We break that moment down in how to find the balance point.
Ready to build one?
Skip the guesswork — get the complete step-by-step build plans.
Get The Plans — $59Short sessions beat long ones
A few focused sessions a week tend to do more than one marathon weekend. Wheelie control is a reflex, and reflexes are built by repetition spread over time. Keep each session tight: warm the bike up with the fans running, run through the stages you've already got, spend most of your time on the stage you're working on, and finish while you're still sharp.
Most riders feel the balance point on the machine within minutes. Holding steady wheelies comes with reps. If you're wondering what's realistic, read how long it takes to learn to wheelie.
Bravery gets you one wheelie. Reps get you all the rest.
Practice mistakes to avoid
A machine makes practice safe. It doesn't automatically make it good. These are the habits that slow riders down even on a rig:
- Stabbing the throttle. Jerky inputs give you jerky wheelies. Roll it on smoothly, every time.
- Riding stiff. Tense arms fight the bike. Stay relaxed and centred and let the bike come up under you.
- Forgetting the brake. The straps will catch you, but the whole point is to build the rear-brake reflex. Cover it on every single rep.
- Rushing the stages. Lengthening the straps before your control is ready just turns practice into survival. Earn each step.
- Skipping the fans. A stationary engine has no airflow. Run the cooling fans for the whole session.
Our guide to common wheelie mistakes goes through the riding errors in more detail.
Where to set it up
You need a flat, solid floor with room in front for the front wheel to lift and room behind for the roller. A concrete garage slab or driveway is ideal — the jack stands need firm ground. You'll be running the engine for long stretches, so train with the door open or outside, never in a closed space where exhaust fumes can build up. And wear your riding gear: the machine stops the bike looping, but you're still on a running motorcycle.
Who uses one
Beginners use a rig to learn from scratch without ever risking their bike. Experienced riders use it to refine control and practise longer, calmer holds. And training shops use them to run sessions for customers. Because the design adjusts to almost any bike, one machine covers all three.
Taking it off the machine
The point of a practice wheelie machine isn't to stay on it forever. It's to arrive at your first real-world attempt with the balance point already in your hands and the rear brake already under your foot. Start somewhere quiet, open and legal, in a low gear, with your gear on. The movement should feel familiar — because it is.
Buy, rent or build?
There are three ways to get time on a machine. Commercial machines from other sellers are often one size and not adjustable, and freight is extra. Pro training schools charge $300+ a day, and you leave with nothing to keep. Or you build your own wheelie machine.
Building is simpler than most riders expect. You source around $1,500 in materials locally, depending on your local prices, follow a cut list and assembly order, and use a welder, grinder, drill and hammer. Our step-by-step build overview and tools and materials checklist show exactly what's involved.
Once it's built it's yours for good — train whenever you want, let your mates use it, or rent sessions out to recover the cost. We cover that in how builders earn from their rigs.
Get the plans
The complete build plans give you everything you need to build your own wheelie practice machine: step-by-step PDF instructions, detailed blueprints with exact measurements, a full materials list, a multi-bike fitment guide, printable workshop diagrams and lifetime updates. It fits pit bikes through to full-size Harleys, downloads instantly and comes with a 6-month money-back guarantee.
Frequently asked questions
Is a wheelie practice machine the same as a wheelie training machine?
Yes — they're two names for the same thing. Both describe a stationary rig that holds your bike, lets the front lift for real and stops it from looping, so you can practise wheelies safely.
Can I practise on any bike?
Virtually any. The adjustable design fits pit bikes, dirt bikes, supermotos, street bikes and full-size Harleys — set the mount and back roller to your wheelbase.
Do I still need to practise on the road?
Yes, eventually. The machine builds the balance point, throttle control and rear-brake reflex, so when you do ride it for real you arrive confident instead of guessing.
Build your own wheelie machine
Put this into practice. Get the complete DIY plans — instant download, fits any bike, 6-month guarantee.
See The Plans →